Rooting a Nook. It seems quite hard, to be honest.
I’m a lazy computer user these days. I used to work in IT support, and so spent a bit more time pulling things apart and putting them back together, and trying to make them work. I used to support Windows machines, so there was a lot of pissing about with registry files and stupid things from the command line.
And then I got a Mac, and got a bit lazy in this area. I rarely use the terminal/command prompt at all these days – I think the only times I use it are:
1. When I want a quick way to whois a domain name; or
2. When I want to make the computer speak (rude things) easily (just go to applications -> utilities -> terminal and type (without the quotes) “say <whatever you want the computer to say>”).
On a Mac?
Anyway, so I don’t use the terminal. There are non-terminal instructions but they involve using Windows computers. I’ve got two windows machines here. One is old and incredibly noisy, and the other is just as old and half way through being reloaded because it’s so incredibly shit. Rooting a Nook on a Mac seems to be quite poorly documented. There’s a lot more documentation for it on Windows.
Why root?
If you look on YouTube, you’ll find people using rooted Nooks to do things you can’t do with a Barnes and Noble Nook, normally. There’s people playing monochrome versions of Angry Birds, or using them for (very limited) web browsing. I had decided to root the Nook for a few reasons. Mainly, I’d like to be able to run Instapaper on it, so things I save to read later, can be read directly on the Nook, without having to connect it up with a cable, wait while Calibre (an ebook reader/converter/downloader) downloads it, etc.
Or for reading the news/blogs/etc.
Also, apparently you can run a Kindle app of some description which ultimately means you can buy books from pretty much any bookstore, and they’ll still be readable on your Nook. It’s also a cheap device. I bought mine on sale at £59, and they’re now down to just £29, if you can find anywhere that has stock.
So this is what I did on my Mac running 10.8.4 Mountain Lion.
Note: I have had a Nook for months, so I’m registered with Barnes and Noble already, have bought books from their store, etc. before. That’s why I appear to miss out the step of registering it.
Another note: You follow these instructions at your own risk. If your Nook no longer works as a result, don’t blame me. This is information garnished from my own experiences, combined with that of other websites. Your Nook is your responsibility. I do not offer support if you choose to follow what I did, and it doesn’t work.
With that in mind…
Things you will need to root a Nook the way I did:
1. A MicroSD card (from what I’ve read on a load of different websites, class 6 or above is recommended. I bought a class 10 8gb Sandisk card for about £8 off Amazon)
2. A Nook Simple Touch. It’ll likely be on firmware version 1.2.1 as Barnes and Noble do silent over-the-air updates to it without you knowing, and 1.2.1 has been out for ages, but check first. (A lot of instructions are for older versions of Nook software, so be careful of that if you’re also following instructions from elsewhere.)
3. Some way of reading/writing to a MicroSD card. I used the card adapter that came with the MicroSD card, and an eye-fi SD card reader that came with my last SD card.
And so I began:
First I looked at this page on babblingengineer.com – but it requires you to use Windows for it, so no good for me – http://www.babblingengineer.com/how-to/how-i-turned-my-nook-into-an-e-reader-monster/
So then I looked at this page on LifeHacker which mentions a utility called Nooter.
http://lifehacker.com/5889158/turn-a-99-nook-into-a-fully-fledged-android-tablet-in-four-easy-steps
However, when I clicked the link for Nooter, I wasn’t sure what I needed. I referred to this apparently excellent guide mentioned in that Lifehacker article: http://forum.xda-developers.com/showthread.php?t=1343143
It only mentions Linux/Windows and I’ve no idea what I’m doing here.
This page on nookdevs.com makes it sound really easy. http://nookdevs.com/Nook_Simple_Touch/Rooting/Manual
It includes some command line information, and tips on how to do it. I downloaded Noogie (eventually, as the first few links don’t work and the mirror pages give you a million options). However, following the instructions got quite confusing.
When I tried the line starting “dd if=/” first it said it didn’t understand the command, then it said permission denied.
After a bit of googling, I discovered it’s a bit like Linux and you have to be logged in as root, which I wasn’t. No mention of that on the instructions though.
It seems on a Mac, you type:
sudo -s
Hit return, and then you’ve got full rights to run anything from that point.
After a lot of fucking about, I got Noogie to write to the SD card. However, when I mounted it again, OSX said it couldn’t read it, and just gave me some options that looked like reformatting.
So the thing that actually worked for me?
See this document: http://forum.xda-developers.com/showthread.php?t=2040351
Download the NookManager-0.5.0.zip file, and unzip it. Inside is just one file: NookManager.img.
As that page doesn’t seem to tell you what to do with it, follow the instructions from here: http://nookdevs.com/Nook_Simple_Touch/Rooting/Manual but substitute noogie.img with NookManager.img – so wherever it tells you to use noogie, you use nookmanager.
(I’m not going to reiterate everything it says in that Nookdevs document, but it’s good, so see above.)
In my case, this meant typing the following things into the terminal:
sudo -s
<entering the password>
diskutil list
diskutil unmountDisk /dev/disk1
At this point, I got the response “Unmount of all volumes on disk1 was successful”
Then I typed:
dd if=/Users/ben/Downloads/NookManager.img of=/dev/disk1 bs=1m
And I got the response:
“64+0 records in
64+0 records out
67108864 bytes transferred in 36.960067 secs (1815713 bytes/sec)”
And that seemed to be it for that part of the instructions.
I unplugged the card reader, then reconnected it. The card was readable. My file list was similar to the ones mentioned on nookdevs.com but not exactly the same.
After getting the MicroSD card set up right
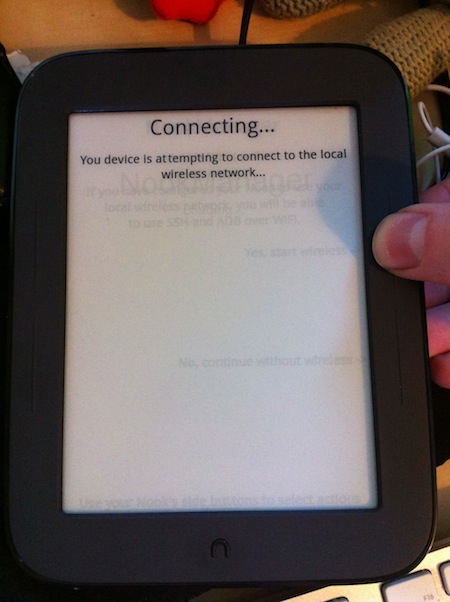
I took out the MicroSD card, inserted it into my Nook, and it went like this. BRING ON THE MASS OF SCREENSHOTS! (Note: see what my finger hovers over, to see which buttons I pressed).


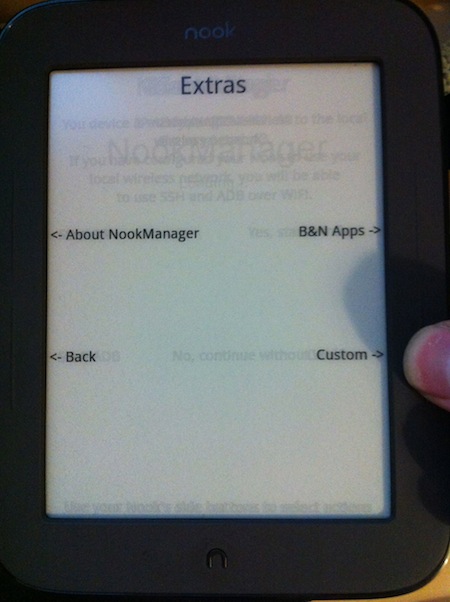
ADB? SSH? I’ve absolutely no idea what I’m doing here. I don’t know if wireless is needed at some later point, so I’ll go with that option.


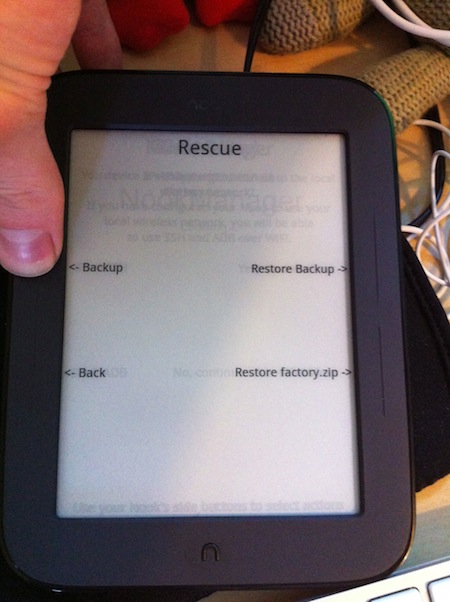

Note: I did half of this again to take some screenshots of what I did. BUT, if you’re doing this for the first time, it will ask you if it can reformat free space on the card in order to do this backup. I said yes to this, although I worried at the time that this would mean it wouldn’t have anywhere to save Android apps. Spoiler: Thankfully, that wasn’t an issue. Go ahead and reformat the unused space.
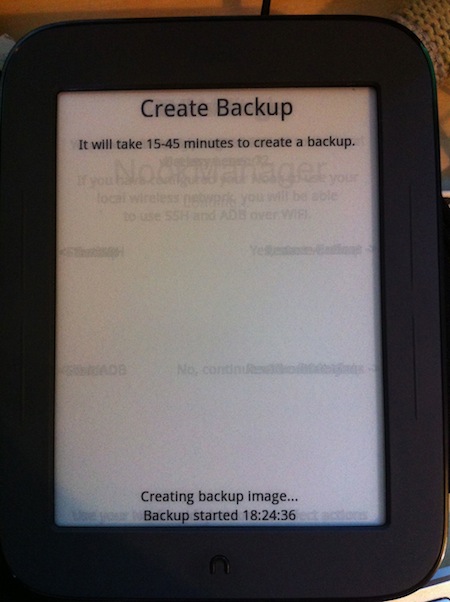
No idea why the backup takes so long, but they’re not kidding with the 15-45minutes. It took a while.


Well that message isn’t terrifying. At all.
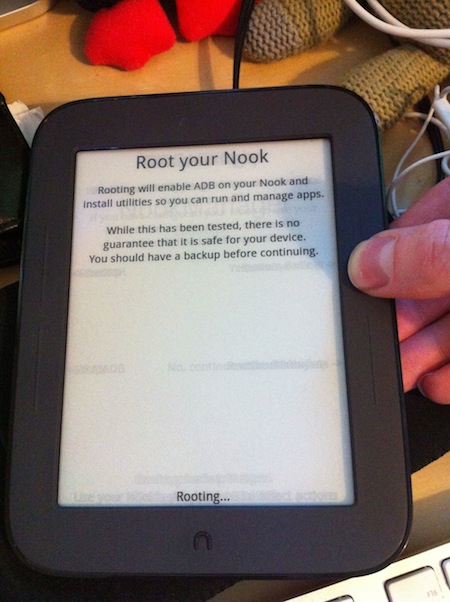

The actual rooting took seconds. Less than a minute, certainly. Not really sure what to do at this point. I went back, and exit.


True to the app’s word, when you remove the MicroSD card, it does reboot.


When it finishes rebooting, it looks like the Nook normally looks. Complete with your modified custom screensavers, if you’ve bothered to set those up.
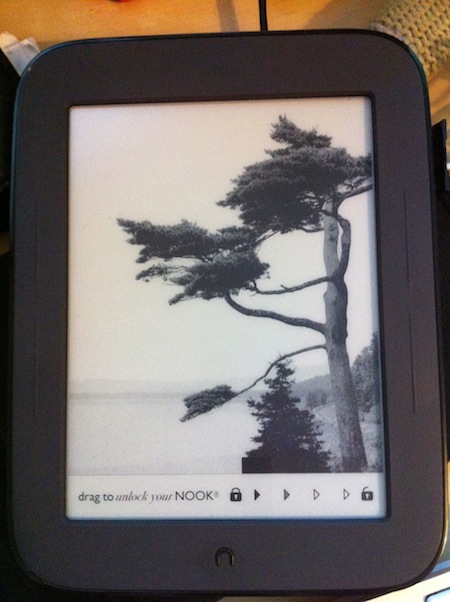
However, when you try and unlock it……

Home or relaunch? Errrm?
A google search found me a different guide to rooting: http://geekanddummy.com/how-to-rooting-the-nook-simple-touch/ which was helpful at this stage. I quote:
“The checkbox, when selected, means “Always” do this. Just choose whichever you want at the time and leave the checkbox unticked. “Home” takes you to the Barnes & Noble interface. “ReLaunch” takes you to an Android interface designed for the Nook. You’ll see these this choices again, whenever you press the Nook button, followed by the “home” icon.”
I chose relaunch and immediately located a book in the file system, then got stuck within it, with seemingly no way back. Pressing the Nook button gives you the home/relaunch button again.
It’s a bit different to anything I’m used to, but all my books are still there, my custom wallpapers I’d installed are still set up. I don’t seem to have lost anything so far. Good news.
The next bit lost me really. A lot of guides to rooting Nooks suggest using your Google account. I can’t be bothered really. I don’t need my email or calendar on my Nook. My contacts aren’t required, as it has no phone capabilities. Also, I’ve got all these things on the phone in my pocket, already.
This page I went to next: http://www.alexroddie.com/2013/06/Nook-Simple-Touch-rooted-minimalist-writing-tablet.html
That (as many articles do), points you to this page: http://forum.xda-developers.com/showthread.php?t=2086582 – Nook Touch Google Apps Attack aka NTGAppsAttack. Keep this open, as you’re going to need it in a minute.
Follow the instructions there, and you’ll end up performing the following keypresses. MORE SCREENSHOTS!


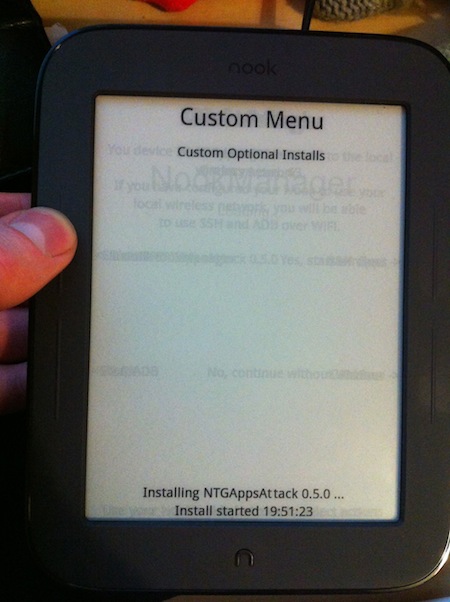
And if you thought the earlier actual rooting was quick….

1 second!
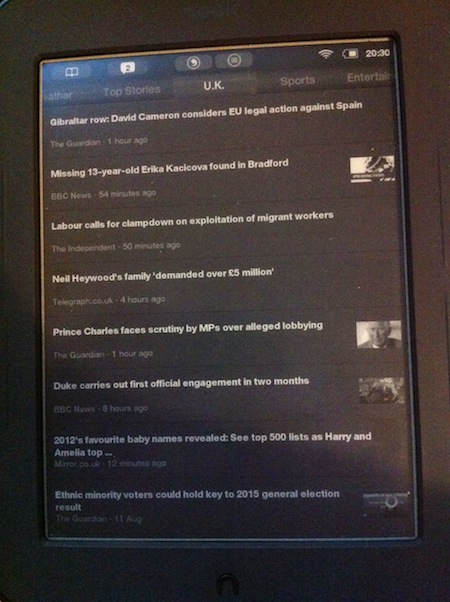
After a few backs, and another restart, keep following the instructions in that last link to setup your Google account. You should then be completely rooted and can do things like this:

That’s breaking news from the BBC. And here’s the mobile version of the Guardian’s website:

Here’s a general news feed (google news, essentially):
Here’s the mobile version of my blog running on a rooted Nook:

And a Kindle-for-Android app:

Update: The day after
So it’s up and running. Sorta. It isn’t perfect.
I’ve got an issue where the screen text gets a bit corrupted, and gets lighter/very poor quality. On some screens it is fine, some screens it isn’t. Which is a bit shit really.
It was worse yesterday just after I rooted it, oddly. Today it doesn’t seem to be doing it half as often.
I’ve fiddled with a load of settings related to screen, to make it refresh after every page, and speed up the refresh speed.
The clarity of it doesn’t seem like what you get on a Nook by default though.
Any compromises?
Yes – there’s a lot of compromises thanks for asking.
You can use the Google Play store, but not through the normal link – sneaked in via a different app (mentioned in one of my previous urls I think).
Sadly, the Kindle app isn’t very good.
I’ve read via numerous places that you can install the Amazon Kindle Android app and read Kindle books on your nook. While you CAN, the latest version doesn’t work. Nor the version before that. No – it has to be quite an old version, and so you have to download it from somewhere else, which I found a pain in the arse to navigate using the terrible web browsers available on what is essentially the slowest Android tablet in the world.
Also, once you get the Android app on and running, it isn’t as good as I’d hoped. You’re not running a optimised-for-e-ink app. You’re running an old Android app on a very very slow Android tablet (the Nook). The Android app has probably been optimised for a colour touch screen, but is instead being displayed on a slow, low-res e-ink screen with what is an average (at best) touch screen.
When you change pages, I *think* the Kindle app tries to animate the page turn or slide it across the screen or something. I’m sure this looks great on a tablet with a colour standard screen, but on e-ink, this looks horrible.
Also, the text isn’t that clear. Not as clear as it is on say the normal Nook reading app. I’m not sure why, but every now and then it looks less ‘like text on a printed page’ (as I believe e-ink readers were initially advertised) and more like the toner has almost completely run out and you’re printing on very cheap paper.
It is better if you make the text size almost as big as it goes, but still not amazing.
Amazon’s app store
I’ve read online that you don’t need to use the Google Play store to get apps. You can use Amazon’s app store instead – which is apparently easier. However, when I try this it tells me that “The Amazon Appstore is not yet available in your region”. Whether this is due to the rooting, or because of something to do with my account, I don’t know.
(A google search suggests it wasn’t available in the UK originally, but now is. The prices are all in dollars when I go to it though. I do have an account on Amazon.com and on Amazon.co.uk, but as far as I can see, the two are very separate. Amazon.com only recommends things I’ve bought from that site, and vice versa. No idea why it doesn’t work.)
Email-to-Kindle.
While trying to read a long PDF on my iPhone, I thought I’d use the “open in…” function on the iPhone, and send it to the Kindle, assuming it would sync it to my Kindle account, and I could read it on the Kindle app on my rooted Nook. Basically that isn’t how it works. It opens it in the Kindle app, but it’s not on your Kindle account – just on your phone.
However, one of the services Amazon offer, that is not offered by their rivals, is the “personal documents service”. You email a file (pdf, .doc, etc.) to a secret @kindle.com email address, and it gets sent to your account. You can then read it from your physical Kindle, or the Kindle app on your iPhone, on your computer, or on your Android tablet.
So at this point I thought I’d email it to my Kindle account via the personal documents service, then sync the app on my rooted Nook, and read it there. That seems like an easier way to read this 130 page .pdf, right?
Except that doesn’t work, either.
After a lot of looking around, syncing and syncing again, it seems (according to Wikipedia), that the personal documents service..
“..can be accessed by Kindle devices, Apple iOS devices running Kindle app version 2.9 or greater, and Android devices running Kindle app version 3.5 or greater.”
3.5 or greater? Balls. You might remember from earlier that I had to go back to an old version of the Android app, due to how old the version of Android is on the Nook. I think I ended up on about 3.1. That’s not going to work then.
Just email it to myself and open it?
I have access to my gmail on my Nook. Why not email it to myself and just open the .pdf file from there?
OR just open it in Opera.
You can do it, but you need a micro SD card inserted to do so. And you can’t boot the device with the micro SD card in, or it loads the software to root/restore the Nook. Hmm. So long as it never runs flat, I guess that isn’t so much of an issue. A bit muddly though.
Instapaper -> Kindle
Instapaper has a service that sends your most recent news stories to your Kindle. Or rather, it doesn’t. It uses the personal documents service to do it, so just like the pdf-email->kindle service, won’t work with my current rooted-Nook setup. Shame.
While Instapaper has an Android app, it doesn’t work on the Nook, according to many Nook-rooting articles.
Sidenotes
Some things do work fine. My google calendar shows up, as does my gmail. The Nook gives you notifications for things coming up in your calendar. Although as it only notifies you if you’re using it at the time, and doesn’t have any ability to make noises, flash lights, etc., that’s pretty useless overall. Don’t use it to remind you of important meetings or flight times.
Also, the touch screen on the Nook is fine for typing in a book title, and mediocre for selecting words/lines of text. Typing an email on it? No. Horrible. Rubbish. You’re never going to do it.
I tried to play a YouTube video, and that produced an error. It would have looked terrible, but I was interested to see if it would work. It didn’t.
The apps preinstalled are an odd mix.
Google Talk – see above re email – text chatting on this rubbish touch screen?
Music? – on a device with no ability to produce sound?
Gallery – grainy black and white images. Easily one of the worst things about an e-reader is the black-and-white nature of it.
There is a news and weather app. The news it seems to take from Google news, as they’re all from different sources. Opening a random BBC news article just shows me the web page in desktop-view. However, the combination of the multitude of fonts sizes, spacing, and the fact that the BBC site is wider than the Nook resolution will cater for, means it doesn’t always look so good. You will lose half of the “related stories” type pane on the right.
I’m not sure grey on grey is a great colour scheme for a monochrome e-ink screen (in the news app). Really quite hard to read.
My blog doesn’t look too bad, I guess.
In summary
Basically all you get with this is an average newsreader (basically just google news, in a monochrome browser), a reasonable email reader (with a shit email writer, thanks to the less-than-brilliant touchscreen), a calendar, and the ability to read Kindle books in a not-as-good-as-actually-doing-it-on-a-Kindle, sort of a way. The user interface is a bit muddly, and there’s loads of things that don’t open.
After using it for a few days and fiddling with a few settings to do with the display, I’ve managed to improve on the Kindle app of old.
It still has some of the problems I noticed immediately – there’s nothing I could do about how ridiculously slow it is. The combination of the poor touchscreen and the speed means you end up tapping something, waiting, waiting, waiting, waiting, tapping it again, only to find out it registered the first time and you’ve just tapped a new button that didn’t exist when you first tapped.
Also, the swapping between the “home” and the “relaunch” sections, I found to occasionally result in the Nook forgetting which book you were reading. It just means you lose your place in your ebook, which is a bit rubbish.
After a week or so of trying out the rooted Nook, I did the thing I should have done from the very beginning and bought a Kindle. I have now unrooted my Nook and returned it to the original firmware. Details of how I did that are covered in this blog post (as I didn’t find that as straightforward as it is meant to be, either). This has also given me the opportunity to do a direct comparison of the current Kindle vs the current Nook (that post also coming soon).
Please help me to give clearly instruction to install NTGAppsAttack ,
rooting my device is never problem with nook manager 0.5
but when i wanna install NTGAppsAttack, i get trouble.
i folllow instruction , after i extract NTGAppsAttack-0.5.0 then copy “custom” folder to Nook manager.,
when nook manager booting , i cant see option “More”, only exit, create back up, and root my devices.
Can u tell me what my fault.
I’m not sure, sorry.
You have to copy the custom folder to the root directory of the MicroSD card – you don’t do anything else with nookmanager once you’ve rooted the device, except use it to run NTGAppsAttack.
When I did mine, I followed the instructions at http://forum.xda-developers.com/showthread.php?t=2086582 and it worked for me. They might be more help than me.
I’d double check what my MicroSD card looks like to see what files/folders I had in the root directory, but I seem to have lost it. Sorry.